# Manually Provisioning a Handset
# Cisco Handsets
# Finding the IP
To find the IP of the handset follow the steps below:
Press the menu button on the handset - It may look like a little page.

Scroll down to 9 - Network.
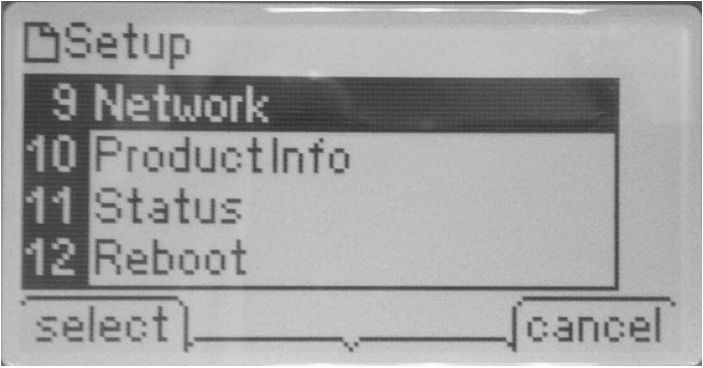
The IP of the handset will be listed under "Current IP".

# Confirming Setting for Access
While in the menu from finding the IP, scroll down to 21 - Call Control Settings.
The Signaling Protocol should be set to SIP.
If it is not, press the "edit" button and then the "option" button to change it to SIP.
Then press the "OK" and "save" buttons.
# Provisioning Settings
Go to the web portal of the handset via the IP address and change to "Admin Login" and "Advanced" in the top right-hand side.
Once you have selected it correctly it should look like this and have the options in the next steps.

Browse to the Ext 1 tab and enter the settings below:

Proxy and Registration
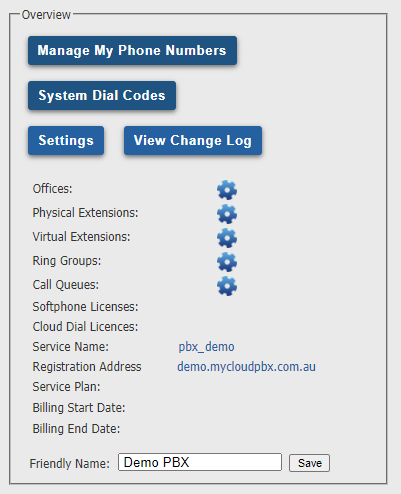
- Proxy: xxx.mycloudpbx.com.au - Alter this to your PBX Registration Address.
This can be found in the Overview section on the main page of your PBX next to "Registration Address"
Subscriber Information
- Display Name, User ID, and Auth ID: Extension number
- Use Auth ID: "Yes"
- Password: Extension password
Audio Configuration
- Preferred Codec: G711a
Dial Plan

- Dial Plan: (*xx|xx.|**|*xx.|**xx.)
Swap to the Provisioning tab and enter the settings below:
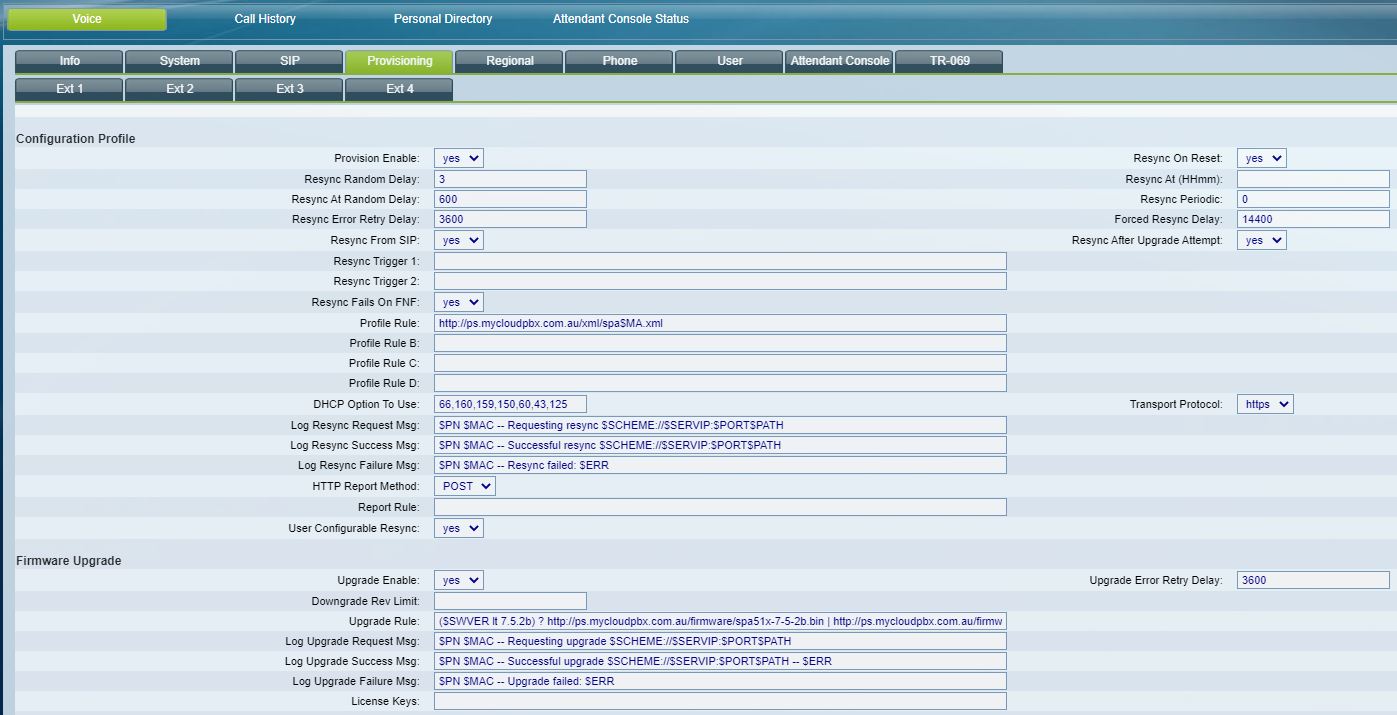
Configuration Profile
- Profile Rule: http://ps.mycloudpbx.com.au/xml/spa$MA.xml
For Cisco SPA50x handsets use:
Firmware Upgrade
- Upgrade Rule: ($SWVER lt 7.5.2b) ? http://ps.mycloudpbx.com.au/firmware/spa50x-30x-7-5-2b.bin | http://ps.mycloudpbx.com.au/firmware/spa50x-30x-7-5-6.bin
For Cisco SPA51x handsets use:
Firmware Upgrade
- Upgrade Rule: ($SWVER lt 7.5.2b) ? http://ps.mycloudpbx.com.au/firmware/spa51x-7-5-2b.bin | http://ps.mycloudpbx.com.au/firmware/spa51x-7-5-6.bin
# Yealink Handsets
# Finding the IP
Press the OK button on the handset and the IP will be listed next to IPv4:.
If your handset does not have an OK button and a touchscreen, follow these steps.
Swipe to the left on your touchscreen.
Select Settings then General and the IP will be listed next to IPv4:.
# Provisioning Settings
Go to the web portal of the handset via the IP address and log in.
- Username: admin
- Password: ‘admin’ or ‘your extension password within ‘MyCloudPBX’
# Provisioning Server
As a standard practice, we aim to have the handset auto-provision from the PBX first before manually.
Go to Settings - On the older portals it will be a tab along the top and on the newer portals it will be an option on the left-hand side.
Go to Auto Provision - This will be an option on the left-hand side.
Enter the Server URL as: http://ps.mycloudpbx.com.au/
Older Portal
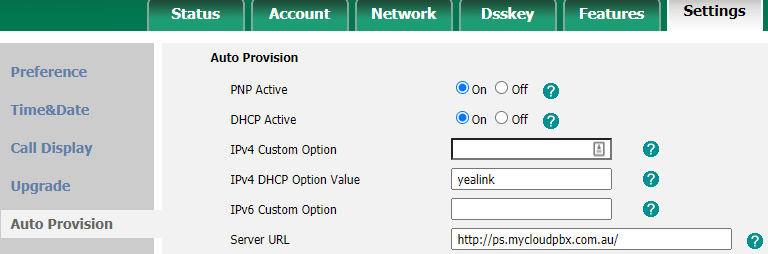
Newer Portal
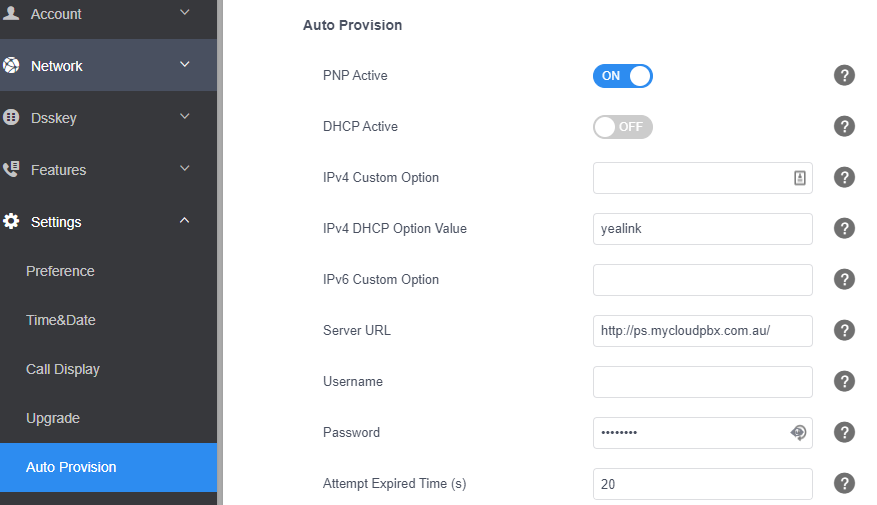
Select the Confirm button at the bottom of the page.
Select the Auto Provision Now button at the bottom of the page.
It will ask "Do you want to autoprovision now?", select the OK button, and wait for it to complete.
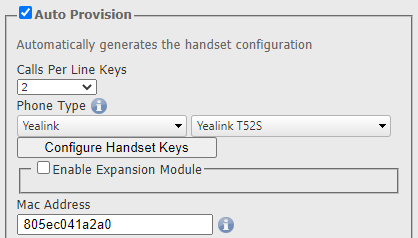
You will need to ensure the details of the handset and the MAC address are in the Auto Provision section under the extension settings.
# Extension Information
If the auto-provisioning does not work, leave those settings in the handset and follow the steps below.
Go to Account - On the older portals it will be a tab along the top and on the newer portals it will be an option on the left-hand side.
Go to Register - This will be an option on the left-hand side.
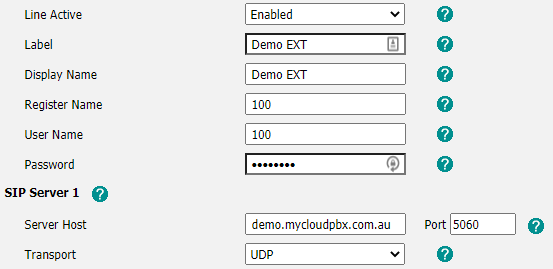
Older Portal
Newer Portal
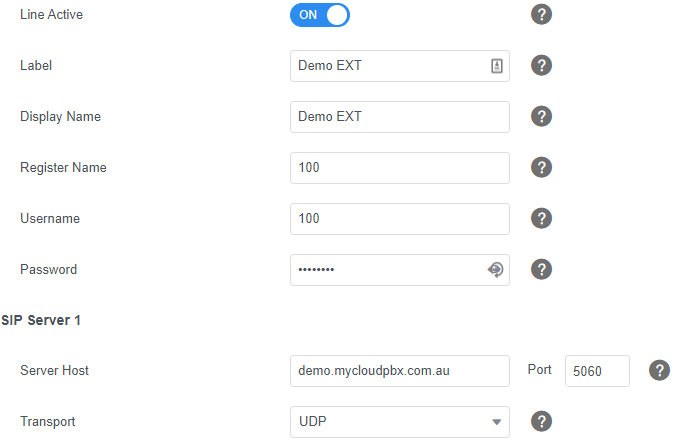
Change Line Active to Enabled or ON.
Enter the following information:
Label: Extension name
Display Name: Extension name
Register Name : Extension number
Username : Extension number
Password: Extension password
Server Host: PBX domain name - xxx.mycloudpbx.com.au
This can be found in the Overview section on the main page of your PBX next to "Registration Address"
Select the Confirm button at the bottom of the page.
Check the Register status (located near the top of the page) to see if the handset registers.