# Holidays Conditions
This guide will help you configure a Holiday Condition for your PBX.
Note: Please ensure that you apply the holiday condition to the call route.
# Setting up the Holiday Condition
From the PBX Homepage select 'Holidays'.

If you want to edit an existing condition, you can click 'View/Edit' on that, otherwise click 'Add Condition'.
Note: You can only apply 1 holiday condition per call route.
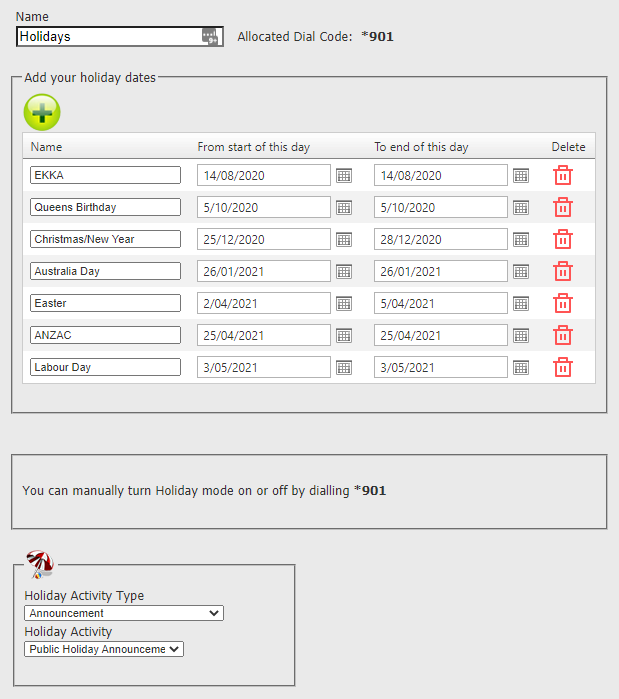
Give the holiday condition a Name. (This is for your reference later).
Add in all dates that your office will be closed. - There is no limit to the entries.
Note: The office will be closed for the entire day and night selected.
Note: You can manually toggle the holiday condition on if you leave the office early with star code listed.
For example if you close for Christmas between midday on the 24th of December and re-open at start of business on the 29th of December.
You would set it to start on 25/12/2020 and end on 28/12/2020 (as seen in the picture) and you would toggle the holiday condition on via *901 when you leave the office at midday on the 24th of December.
At the bottom of the screen you can choose what will happen on any given holiday, this is listed under Activity Type:
Options:
- External Phone Number: Landline or mobile number, etc.
- Hangup
- Announcement
- Advanced Day/Night Control: Useful if you would like to do 2 different activities at different times of the day.
- Conference: A fully functional conference bridge.
- Extension: Send the call directly to a specific extension.
- IVR
- Ring Group: Send the call to a group of phones.
- Voicemail: Send the call to voicemail.
- We recommend "Voicemail No Msg" to avoid default messages preset on the PBX.
Activity: Choose from the available options pre-configured.
Click 'Save' when you're finished making changes.
# Assigning the Holiday Condition to the call route
You will now need to assign the holiday condition to an inbound route.
Click 'Return to Service' to go back to the PBX homepage and select 'Call Routing'.

Find the number for which you wish to enable the holiday and then click 'view/edit'.
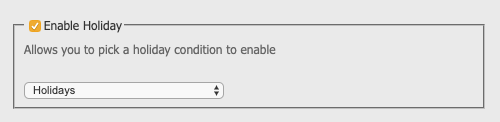
Scroll down to the page and check 'Enable Holiday'.
Choose from the drop down list the holiday condition you wish to enable.
Scroll down the page and click 'Save' when you are finished.

Your changes are now ready to 'Apply' to your PBX.
Click 'Apply PBX Changes'.