# Call Recordings
Call recordings can be enabled for inbound calls (per call route), outbound calls (per extensions), or both.
# Enabling Call Recordings
To turn on call recordings for a call route, you must first enable the call recording functionality on your PBX.
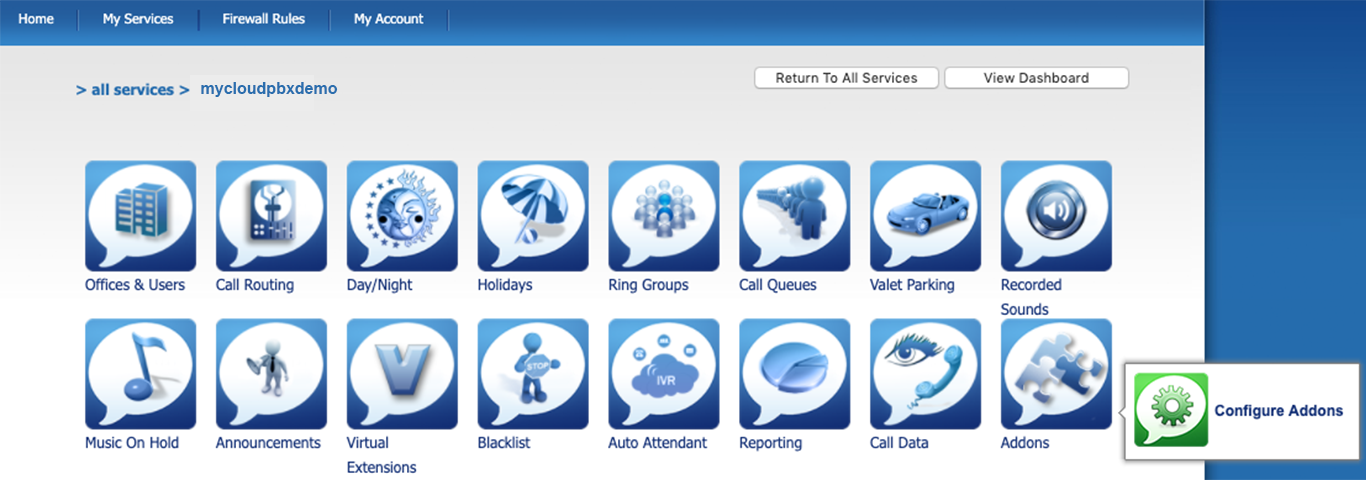
Hover over 'Addons' and select 'Configure Addons'.
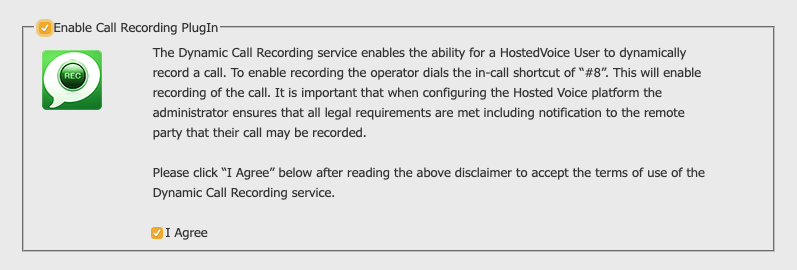
Scroll down until you see 'Enable Call Recording Plugin'.
Note that you will have to agree to the disclaimer before you can enable the plugin.
Scroll to the bottom of the page and click 'Save' to save your changes.
You will now be taken back to the PBX homepage and can now turn on recordings for either inbound calls, outbound calls, or both as per your needs.
# Enabling Call Recordings for inbound calls
To enable call recordings for an inbound route, select 'Call Routing' from the PBX homepage. ![]()

Find the number for which you wish to enable call recordings and then click 'view/edit'.

Click the checkbox to 'Enable Call Recording' for all inbound calls.
Scroll down to the bottome of the page and click 'Save' to save your changes.

Your changes are now ready to 'Apply' to your PBX.
Click 'Apply PBX Changes'.

Click 'Return to Service' to go back to the PBX homepage.
# Enabling Call Recordings for outbound calls
To enable call recordings for outbound calls, select 'Offices & Users' from the PBX homepage. 

Select the extension you wish to modify.
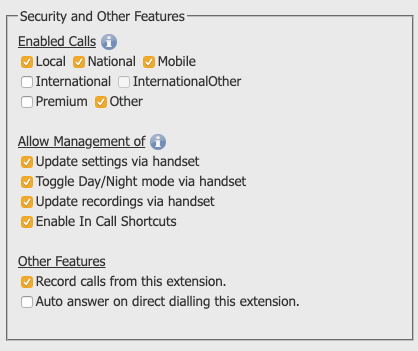
Scroll to the bottom of the page to the "Security and Other Features' section and use the checkbox to enable call recording as shown.
Click 'Save & Close
Your changes are now ready to 'Apply' to your PBX.
Click 'Apply PBX Changes'.
# Accessing Call Recordings
There are two ways to access your call recordings.
- FTP
- Hosted PBX Dashboard
# Hosted PBX Dashboard
Log into the Hosted PBX Dashboard with the same username / password you use for the management portal. - If you do not have this, contact your administrator.
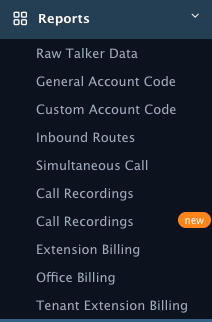
Once logged in to the dashboard, expand the 'Reports' section on the left hand menu and select 'Call Recordings'.

Here you can filter your call recordings via date, and even search by number.
Click 'Play' or 'Download' to listen to your recordings.
# FTP

From the PBX homepage, hover over "Addons' and select 'Call Recordings'.
On the following screen you will be able to set your login credentials for FTP access.
# Call Recording Encryption
To comply with data protection regulations and to provide enhanced security, the PBX provides the option to encrypt call recordings with a user provided public key.
# Generating a Public/Private key pair.
To enable call recording encryption you will first need to generate a Public/Private key pair.
To create a Public/Private key-pair we recommend using OpenSSL
Windows users
Download OpenSSL for Windows (https://wiki.openssl.org/index.php/Binaries)
To run the commands below, go to the OpenSSL32 directory on your PC, and change to the /bin directory
You may need to open the command prompt with admin privileges (run as administrator) and you will need to restart your computer before generating a certificate.
Mac users
OpenSSL comes shipped with Mac OS X version 10.6.2 onwards.
You can use Terminal to run OpenSSL (Open Applications > Utilities > Terminal or search for ‘terminal’ using the search bar in the top right hand corner of your screen) run the commands below.
You may need to run each OpenSSL command lines with elevated privileges. – add sudo before each command as needed.
Using OpenSSL
The basics command line steps to generate a private and public key using OpenSSL are as follows:
openssl req -newkey rsa:2048 -nodes -keyout myprivatekey.pem -x509 -days 1825 -out mypublickey.pem
WARNING!
STORE YOUR PRIVATE KEY IN A SAFE, SECURE LOCATION. IF THE PRIVATE KEY IS LOST, ENCRYPTED FILES CAN NOT BE DECRYPTED
# Enabling Call Recording Encryption.
To enable call recording encryption you will first need to log into the https://mycloud.telair.com.au Portal.
Once logged in, click on 'My Services' and then expand the 'Voice' section.
Select the PBX you wish to enable call recording encryption.
Hover over 'Addons' and click 'Configure Addons'.
Enable the call recording encryption and paste a copy of your PUBLIC KEY.
Click 'Save'
Recorded calls will now have a “.enc” suffix to identify call recorded with a user provided public key.
# Decrypting Call Recordings
To decrypt call recordings, use the following command. (Adjust for your filename..)
openssl smime -decrypt -binary -in RECORDING_NAME.mp3.enc -inform DER -out RECORDING_NAME.mp3 -inkey myprivatekey.pem