# Hosted PBX Dashboard
# What's on your Hosted PBX Dashboard?
The Dashboard displays critical information about your Hosted PBX system, providing granular reporting data for a real-time or historical view of the activities within your phone system.
Drill down into user performance and call reports for valuable insight into resolution times, response rates and optimal service times.
# Feedback
Are there any reports or charts you would like to see?
Let us know!
Simply click the feedback bubble and send us your valued feedback. This will assist us in making improvements to the Dashboard and reporting.
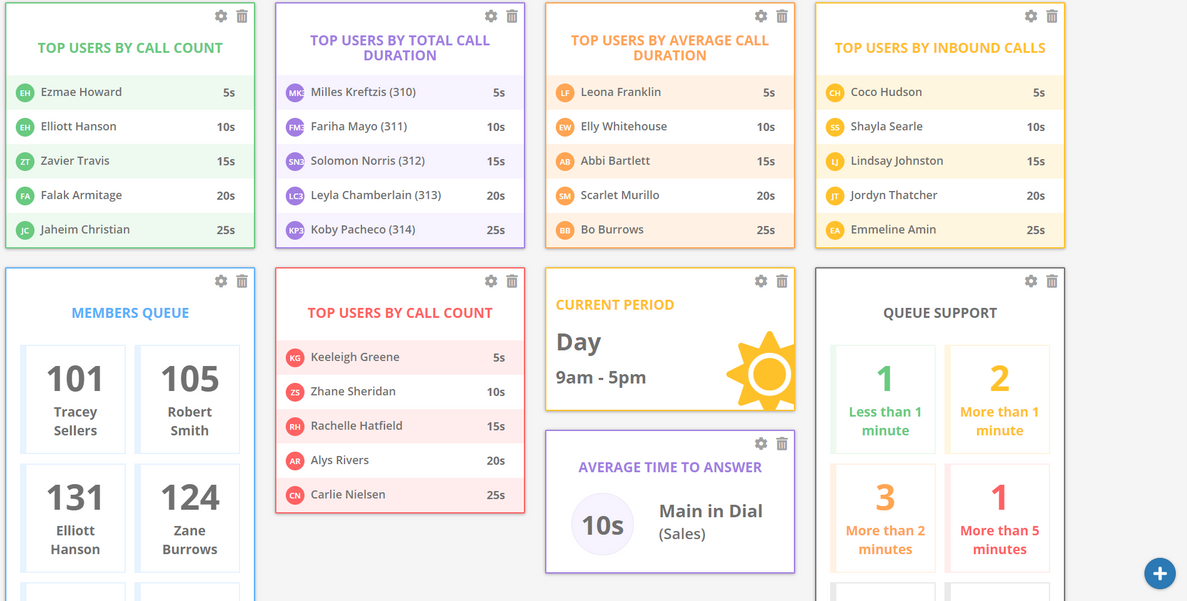
# Dashboard Widgets
The Dashboard drills down into user performance and call reports, giving valuable insight into resolution times, response rates and optimal service times.
# Create a new Dashboard
From the left hand menu, click the  'Home' button.
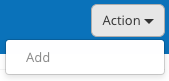
On the top right hand corner click the 'Action' button, then click 'Add'.
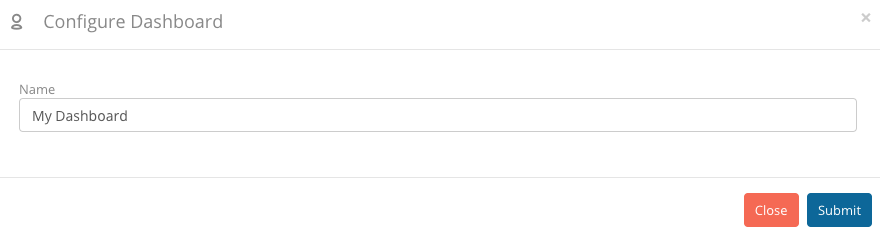
Name your new Dashboard and click the  button.
# Adding Widgets
To add widgets to the Dashboard, click the  button on the bottom right hand side of the page.
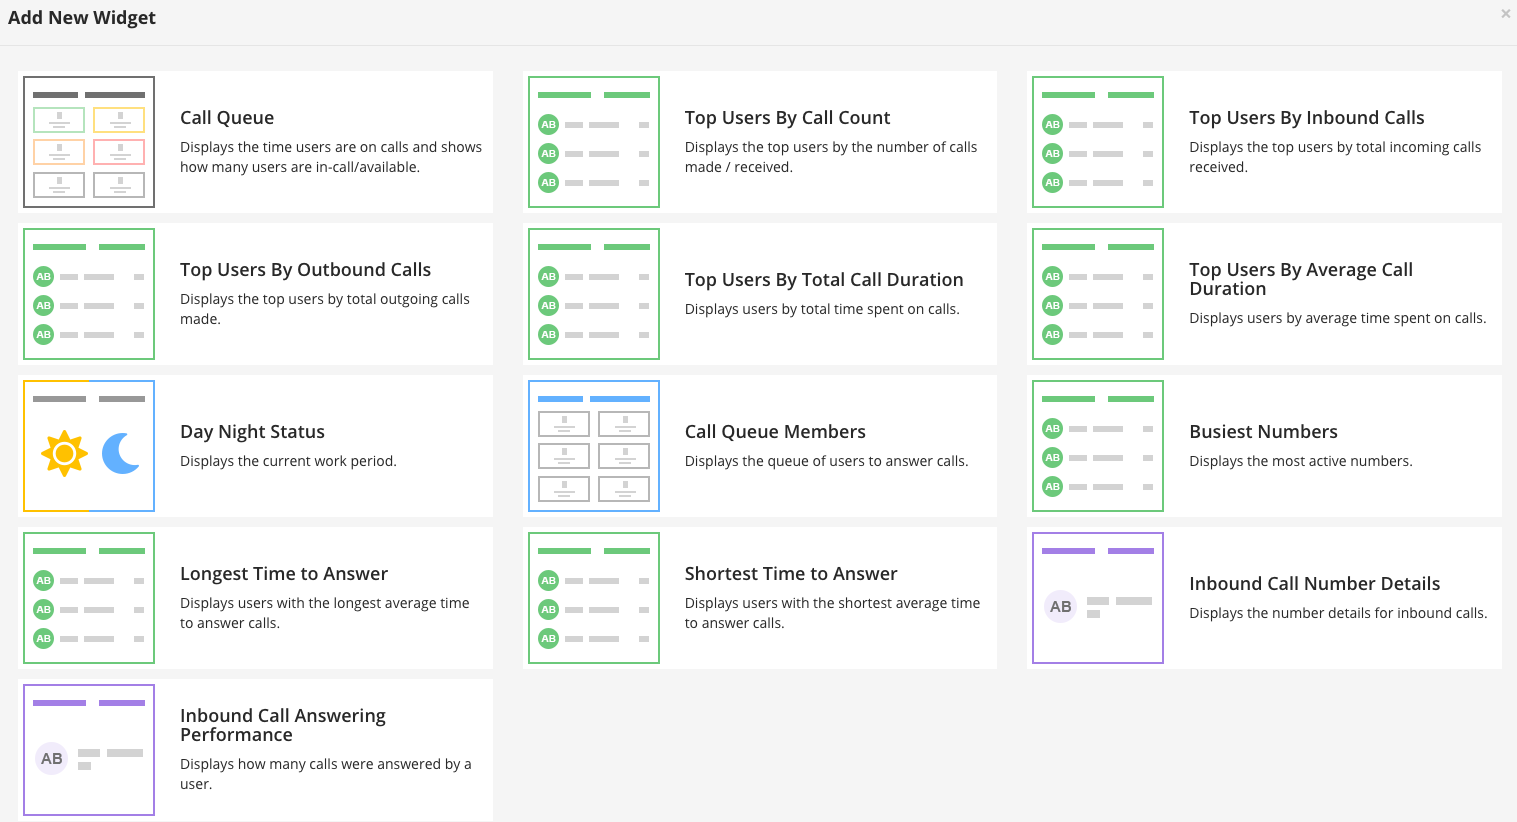
When you select a widget, you may be asked to choose some additional settings. Do so, then click the button.
# Unique URL for Wallboards
You can also generate a unique URL for each specific Dashboard, allowing you to keep a close eye on your statistics.
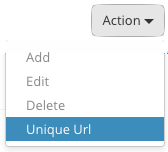
On the top right hand corner click the 'Action' button, then click 'unique URL'.
Copy the URL that is provided and open it on any web browser.
# Call Reports
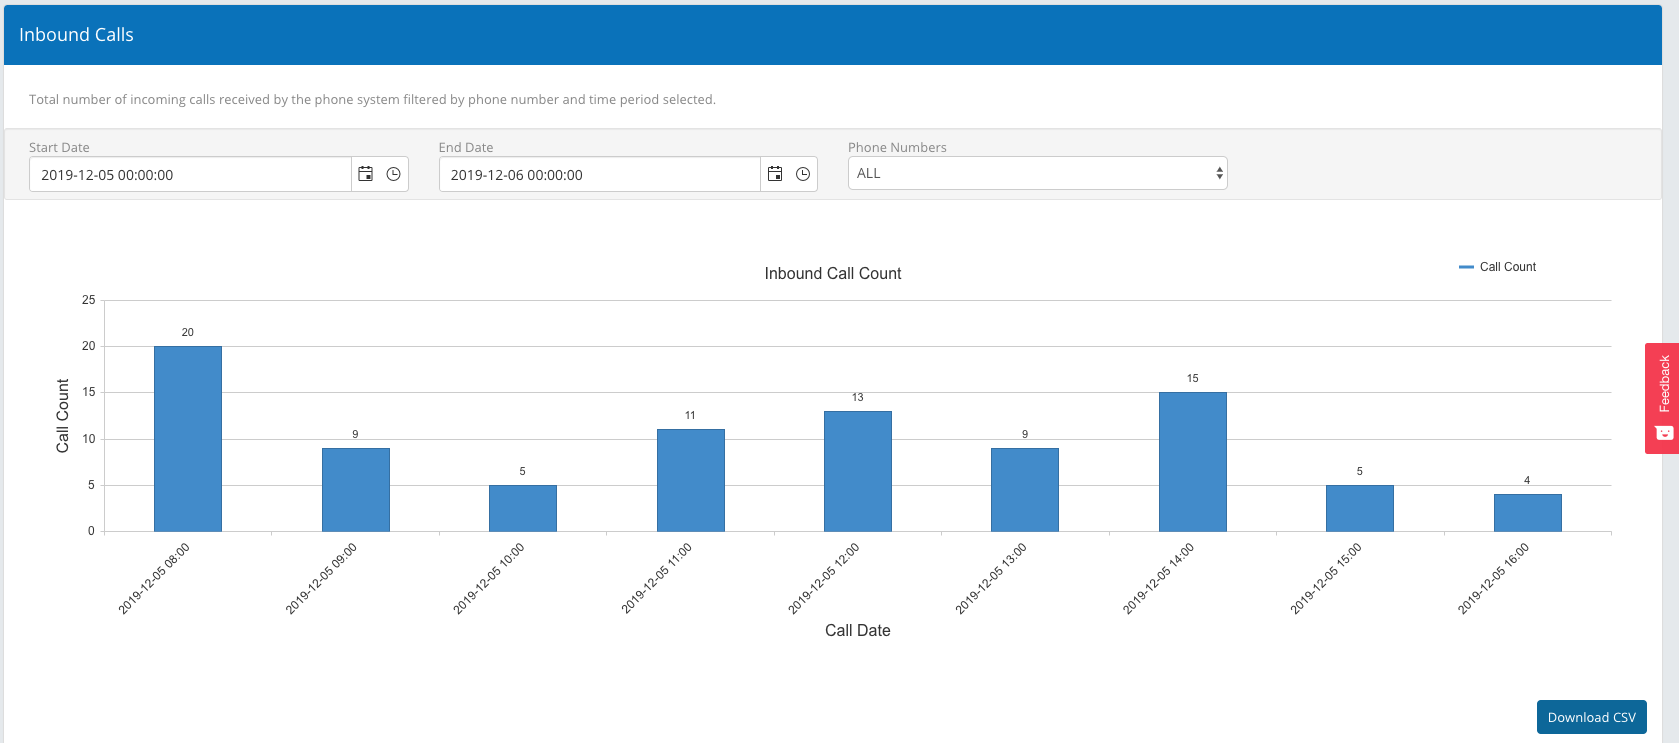
# Inbound Calls
The 'Inbound Calls' report shows the total number of incoming calls received by the phone system, filtered by the phone number & time period selected.
- Select any time period with a maximum of 7 days between them.
- Choose any phone number, or all phone numbers.
- Click the 'Feedback' button to provide feedback or feature requests.
Click  to download a copy in CSV format.
# Abandoned Calls
The 'Abandoned Calls' report displays the total number of inbound calls where no user spoke to the caller and it did not go to Voicemail.
- Select any time period with a maximum of 7 days between them.
- Tick the checkbox if you wish to include calls that went to voicemail.
- Click the 'Feedback' button to provide feedback or feature requests.
Click to download a copy in CSV format.

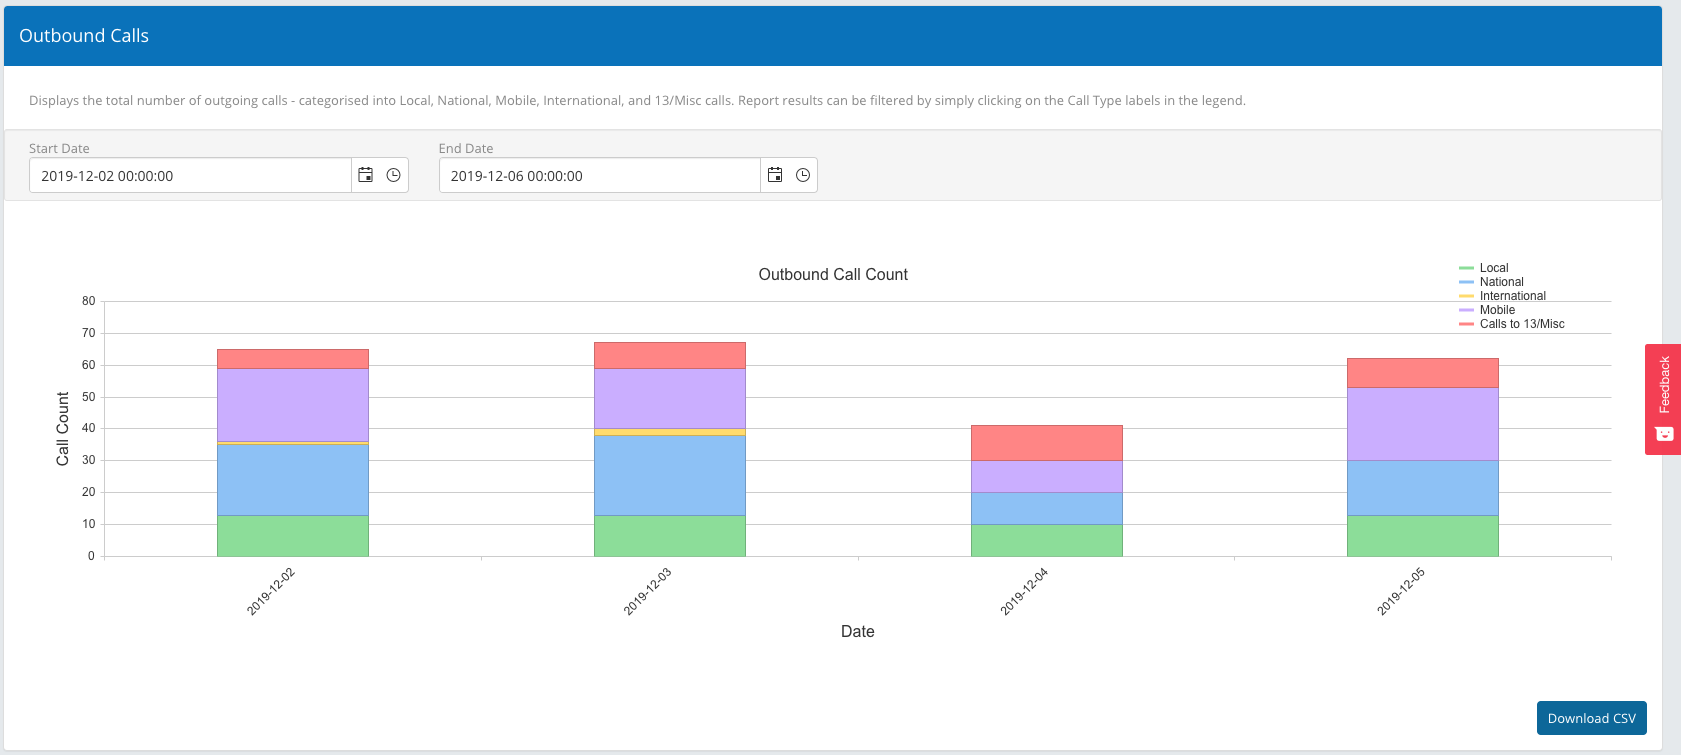
# Outbound Calls
The 'Outbound Calls' report displays the total number of outgoing calls - categorised into Local, National, Mobile, International, and 13/Misc calls.
Report results can be filtered by simply clicking on the Call Type labels in the legend.
- Select any time period with a maximum of 7 days between them.
- Report can be filtered by clicking on the labels in the legend on the right hand side.
- Hover over the bar graph to see the exact number of calls.
- Click the 'Feedback' button to provide feedback or feature requests.
Click to download a copy in CSV format.
# Time to Answer
The 'Time to Answer' report displays the average time taken for a call to be answered by a user.
- Select any time period with a maximum of 7 days between them.
- Choose a phone number / numbers from the drop down menu.
- Click the 'Feedback' button to provide feedback or feature requests.
Click to download a copy in CSV format.
# Export Call Records
The 'Export Call Records' report allows you to download an easy to digest csv report with the following headings:
- Callguid: Unique reference ID for the call.
- Calldatetime: Date / Time of the call.
- Moli: Mobile Originating Location Indicator (MoLi).
- Serviceid: Hosted PBX Service ID.
- Servicename: Hosted PBX Service Name generated when the PBX was first created.
- Servicefriendlyname: A more 'user friendly' name for your PBX.
- Direction: Direction of call. (In, Out, Internal).
- Dialplan: Dialplan Used: AU (Australia), NZ (New Zealand)
- Externalid: Shows the caller ID.
- Originnumber: Shows the originating caller ID.
- Originname: Reserved for future use.
- Targetnumber: Destination number.
- Targetname: Reserved for future use.
- Jurisdiction: Shows the 'International Jurisdiction' (Used for International billing).
- Jurisdictiondesc: Reserved for future use.
- Originregion: Reserved for future use.
- Destinationregion: Reserved for future use.
- Duration: Total duration of the call.
- Billabletime: Total billable time of the call.
- Ratetype:
- Local
- National
- Mobile
- Calls to 13/Misc
- Calls to 1800
- Hangupreason: The hangup reason for the call.
- Originuseragent: Where available, this will show the user agent that made the call.
- Originipaddress: For calls that originated internally, will show the IP Address of the caller.
- Accountcode: Used with 'Account Code Dialling', will show the account code that was dialled.
- Rtpmos: Used to measure call quality.
- When using the G711 codec, this can be as high as 4.5.
- When using the G729 codec, this can be as high as 3.9.
- Rtpquality: Used to measure call quality. Maximum is 100.
- Calltimezone: Reserved for future use.
- Callroutename: Reserved for future use.
- InboundExtensionNumber: Where available, this will show the extension number that answered the call.
- InboundExtensionName: Where available, this will show the name assigned to the extension number that answered the call.
- OfficeName: Reserved for future use.
- FirstTalker: For inbound calls, this will show the first talker.
# Usage
Select the start and end date ranges as well as the phone number(s).
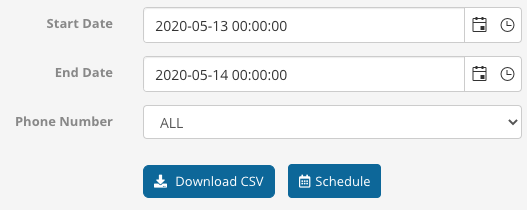
Click to download a copy in CSV format.
You can also schedule this report by clicking the  button.
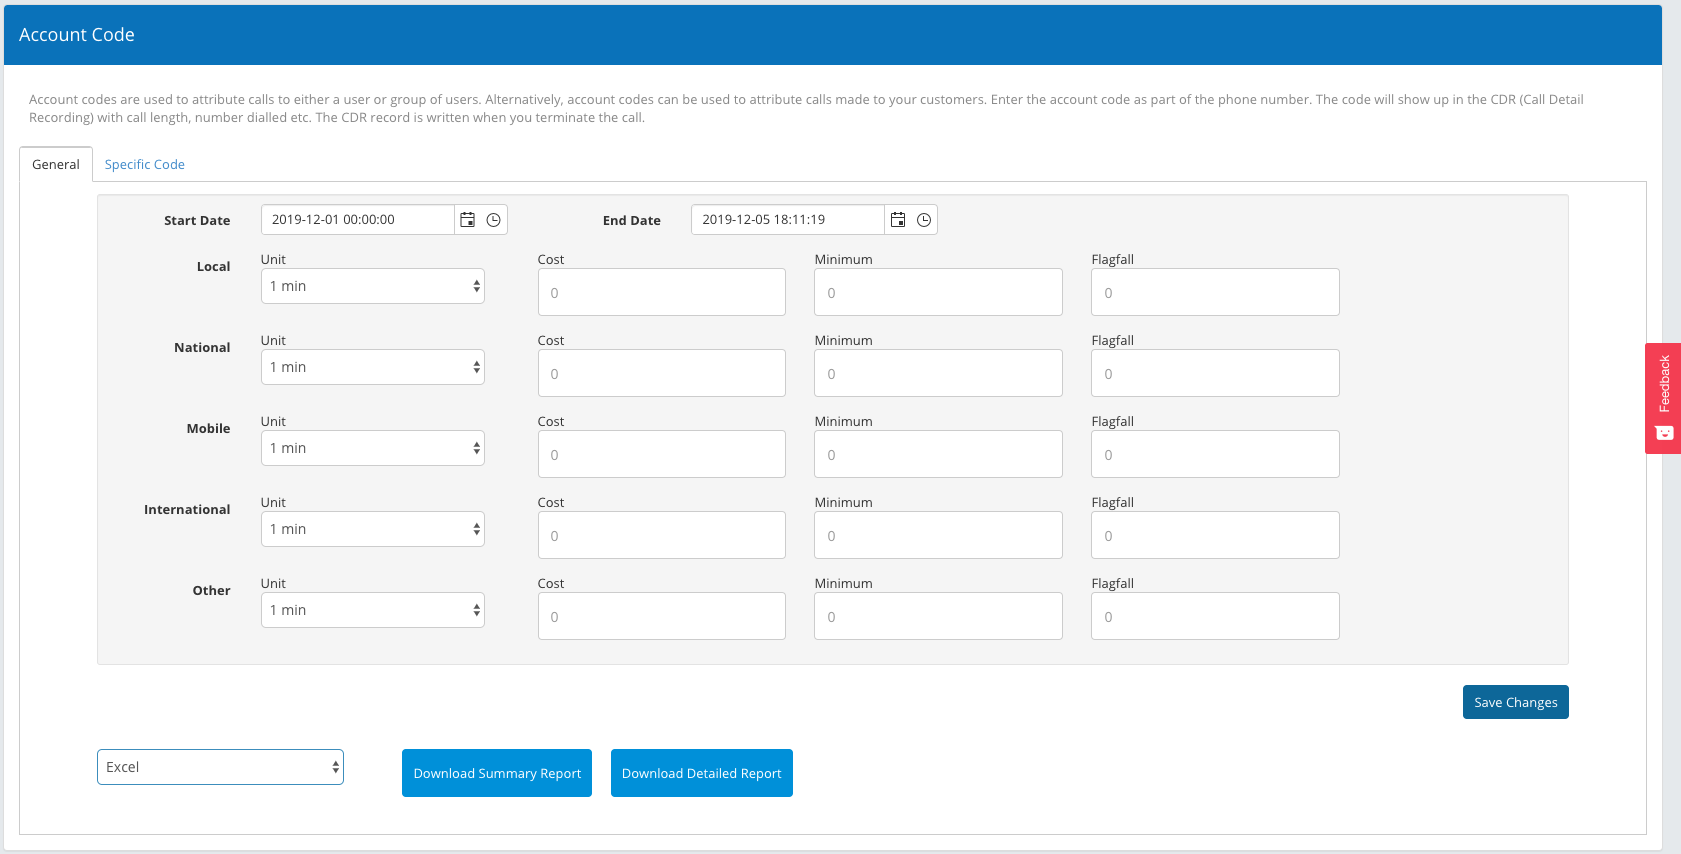
# Account Code
# Background information about Account Codes
Account codes are used to attribute calls to either a user or group of users. Alternatively, account codes can be used to attribute calls made to your customers.
When a call is made, you can enter the account code as part of the phone number. The code will show up in the CDR (Call Detail Recording) with call length, number dialled etc. The CDR record is written when you terminate the call.
This functionality would typically be used by anyone who bills specifically for their time, eg: lawyers.
# Usage
The 'Account Code' report takes each call with account codes and assigns them a dollar value.
Specify the start & end date ranges.
Assign the following values to each of the call types:
- Unit: Choose from 1 second, 30 seconds, or 1 minute increments.
- Cost: Enter the cost (per unit) in cents.
- Minimum: Enter the minimum call cost, in cents.
- Flagfall: Enter the flagfall rate here. (This is the cost that is applied once the call is connected.
Click  to save your settings.
- Choose from Excel or PDF format, then download either the 'Summary' or 'Detailed' report.
# Call Recordings
The 'Call Recordings' page allows you to play or download recorded calls. Calls can be searched by the calling number (origin), or the called number (target).
- Select the start & end dates.
- Enter a number to search (if required)
Click 
Once the data has loaded, you will be able to see the following information about each call:
- Origin: This is the source number.
- Target: This is the destination number.
- Duration (sec): Duration of the call, measured in seconds.
- Call Date: Date / Timestamp of the call.
- Download: Click here to download a copy of the call recording.
- Play: Click here to play the recording.

# User Reports
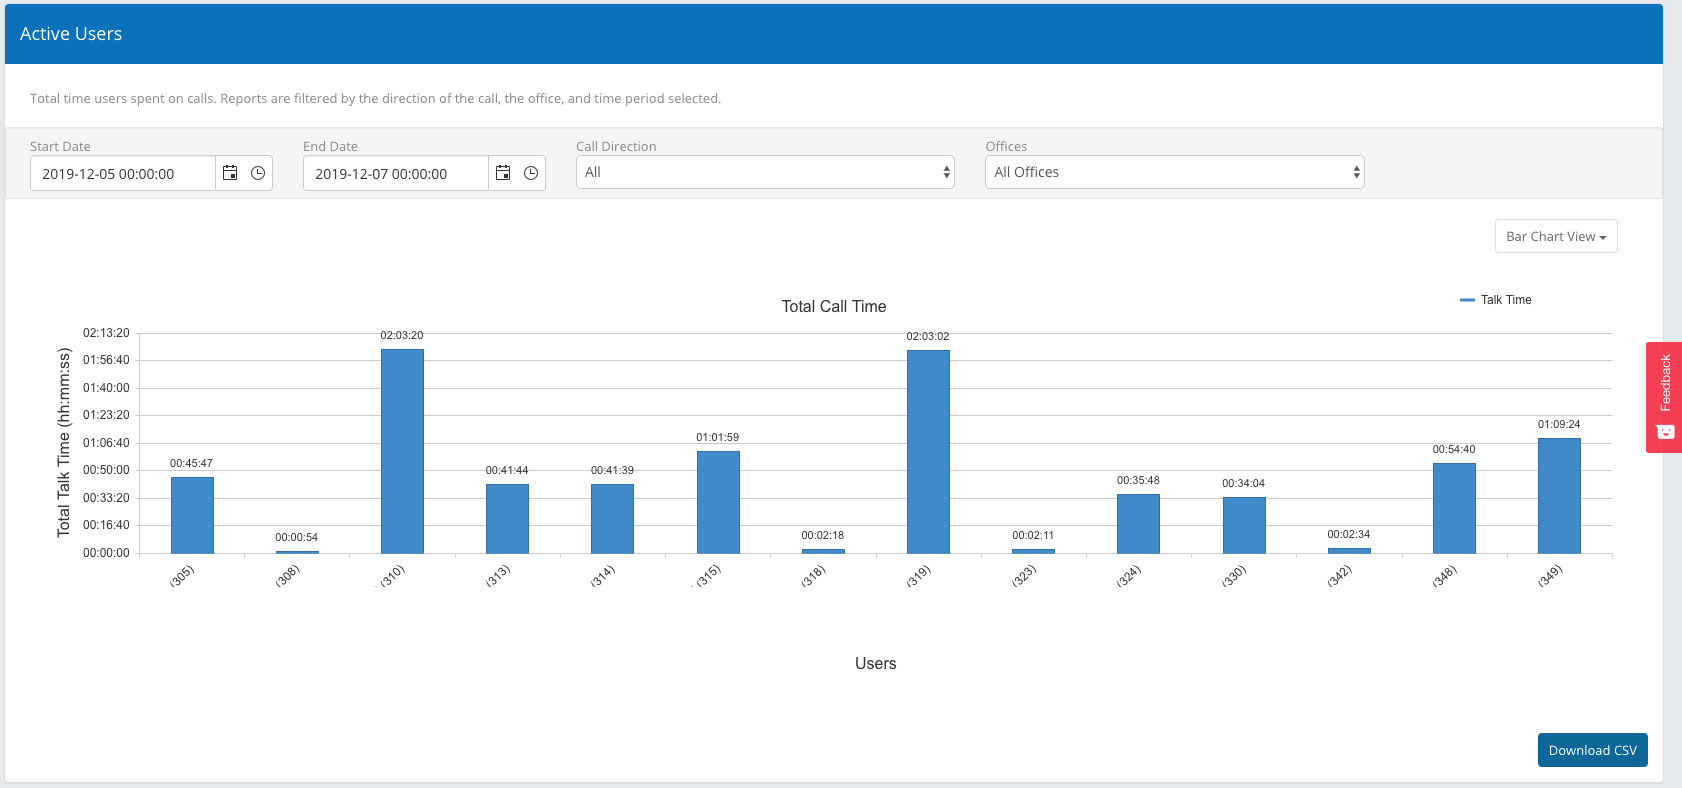
# Active Users
The 'Active Users' report shows the total time users spent on calls. Reports are filtered by the direction of the call, the office, and time period selected.
Select any time period with a maximum of 7 days between them.
Select your 'Call Direction':
- All
- Internal (This will only display calls made internally.
- Inbound (This will only display inbound calls. (calls that you answered).
- Outbound (This will only display outbound calls (calls that you made).
Select the 'office', or simply select 'all offices'.
Click the 'Feedback' button to provide feedback or feature requests.
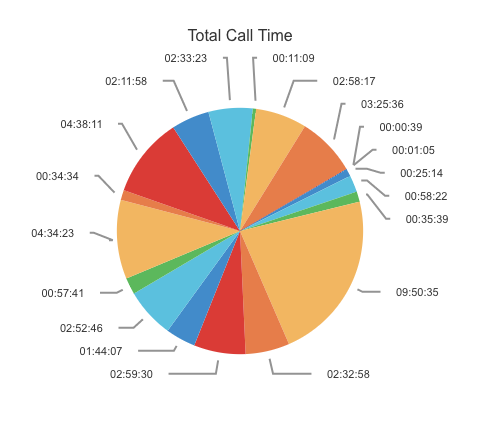
TIP: You can also choose between a bar graph and a pie chart by clicking the button in the top right hand corner of the graph.
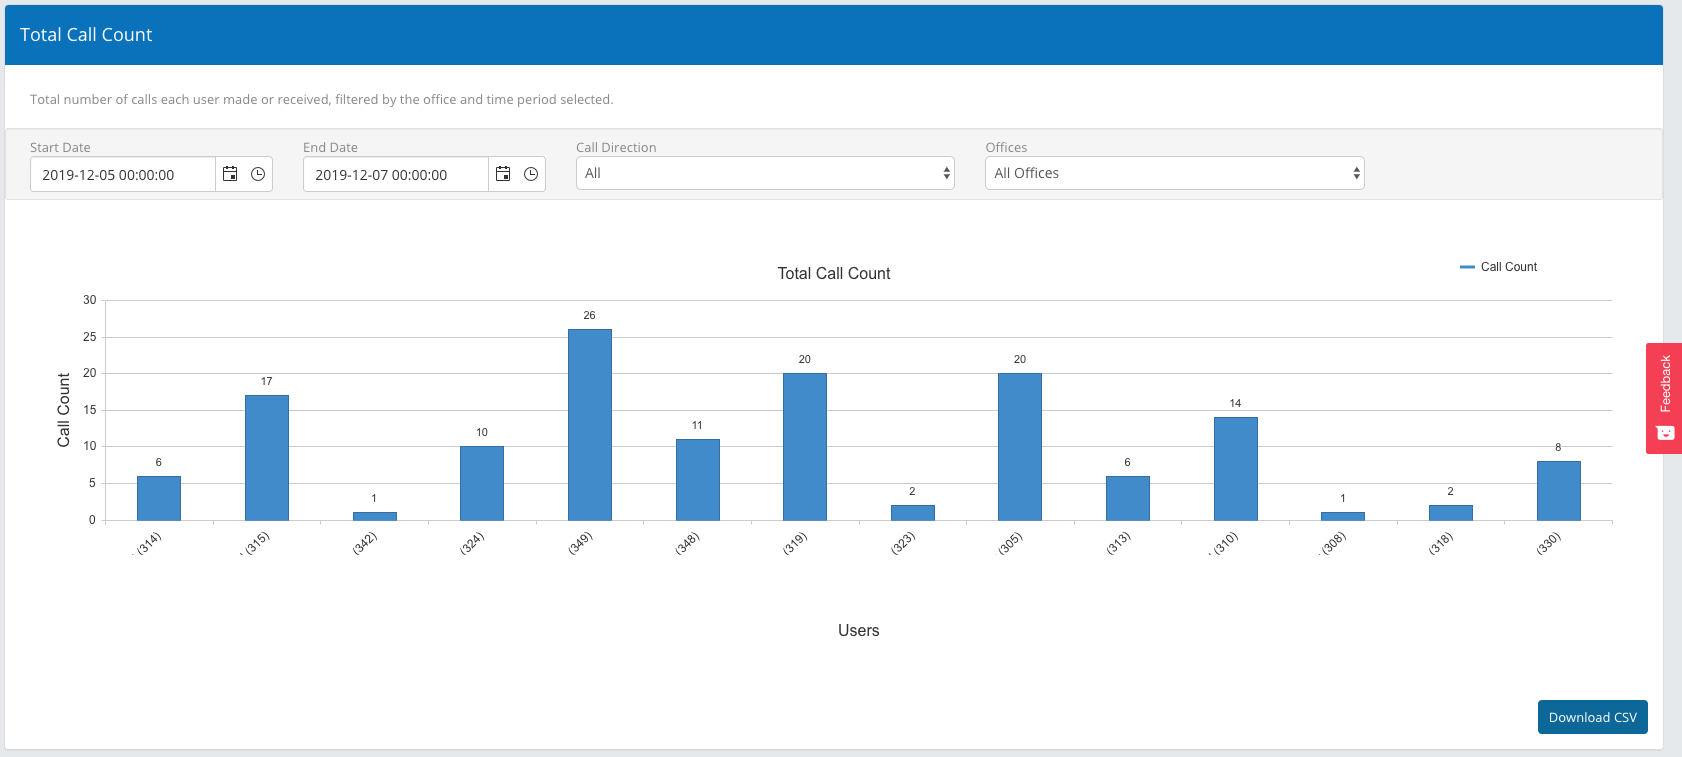
# Total Call Count
The 'Total Call Count' report shows the total number of calls each user made or received, filtered by the office and time period selected.
Select any time period with a maximum of 7 days between them.
Select your 'Call Direction':
- All
- Internal (This will only display calls made internally.
- Inbound (This will only display inbound calls. (calls that you answered).
- Outbound (This will only display outbound calls (calls that you made).
Select the 'office', or simply select 'all offices'.
Click the 'Feedback' button to provide feedback or feature requests.
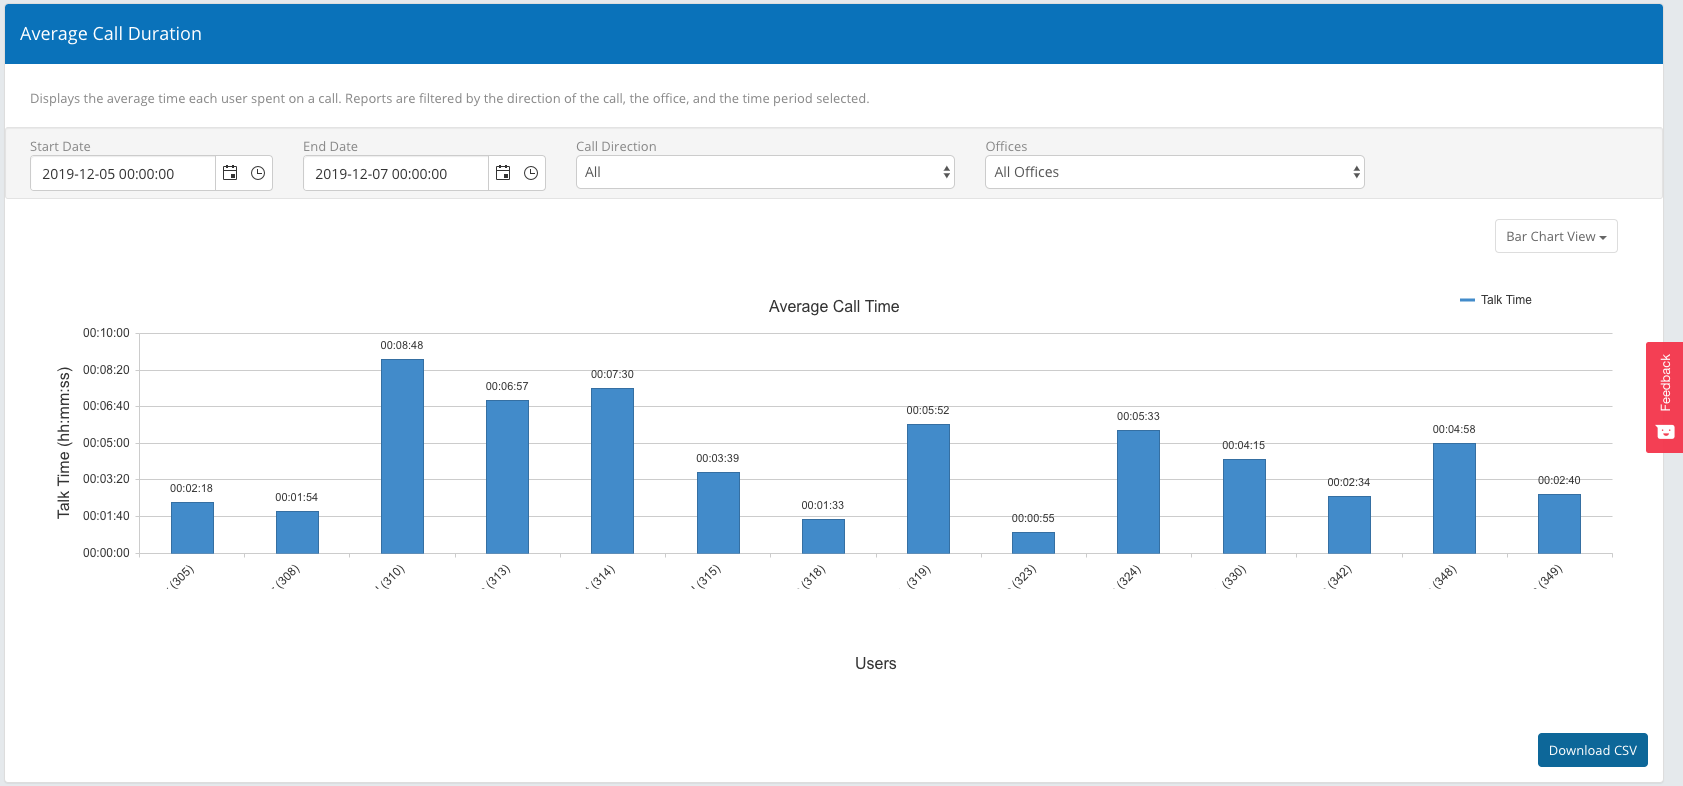
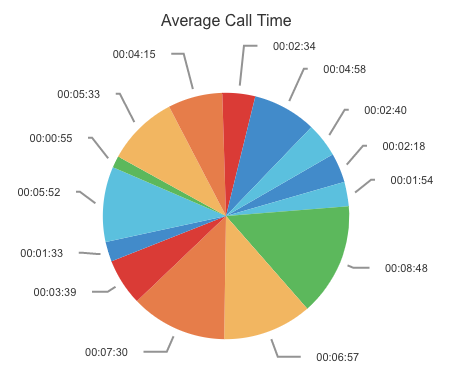
# Average Call Duration
The 'Average Call Duration' report displays the average time each user spent on a call. Reports are filtered by the direction of the call, the office, and the time period selected.
Select any time period with a maximum of 7 days between them.
Select your 'Call Direction':
- All
- Internal (This will only display calls made internally.
- Inbound (This will only display inbound calls. (calls that you answered).
- Outbound (This will only display outbound calls (calls that you made).
Select the 'office', or simply select 'all offices'.
Click the 'Feedback' button to provide feedback or feature requests.
TIP: You can also choose between a bar graph and a pie chart by clicking the button in the top right hand corner of the graph.
# Scheduled Reporting
Scheduled Reporting allows you to create a report and receive it in your inbox when you need it.
If a report is available for scheduling, you will see this button:
# Creating a report
Click the button to create your report.
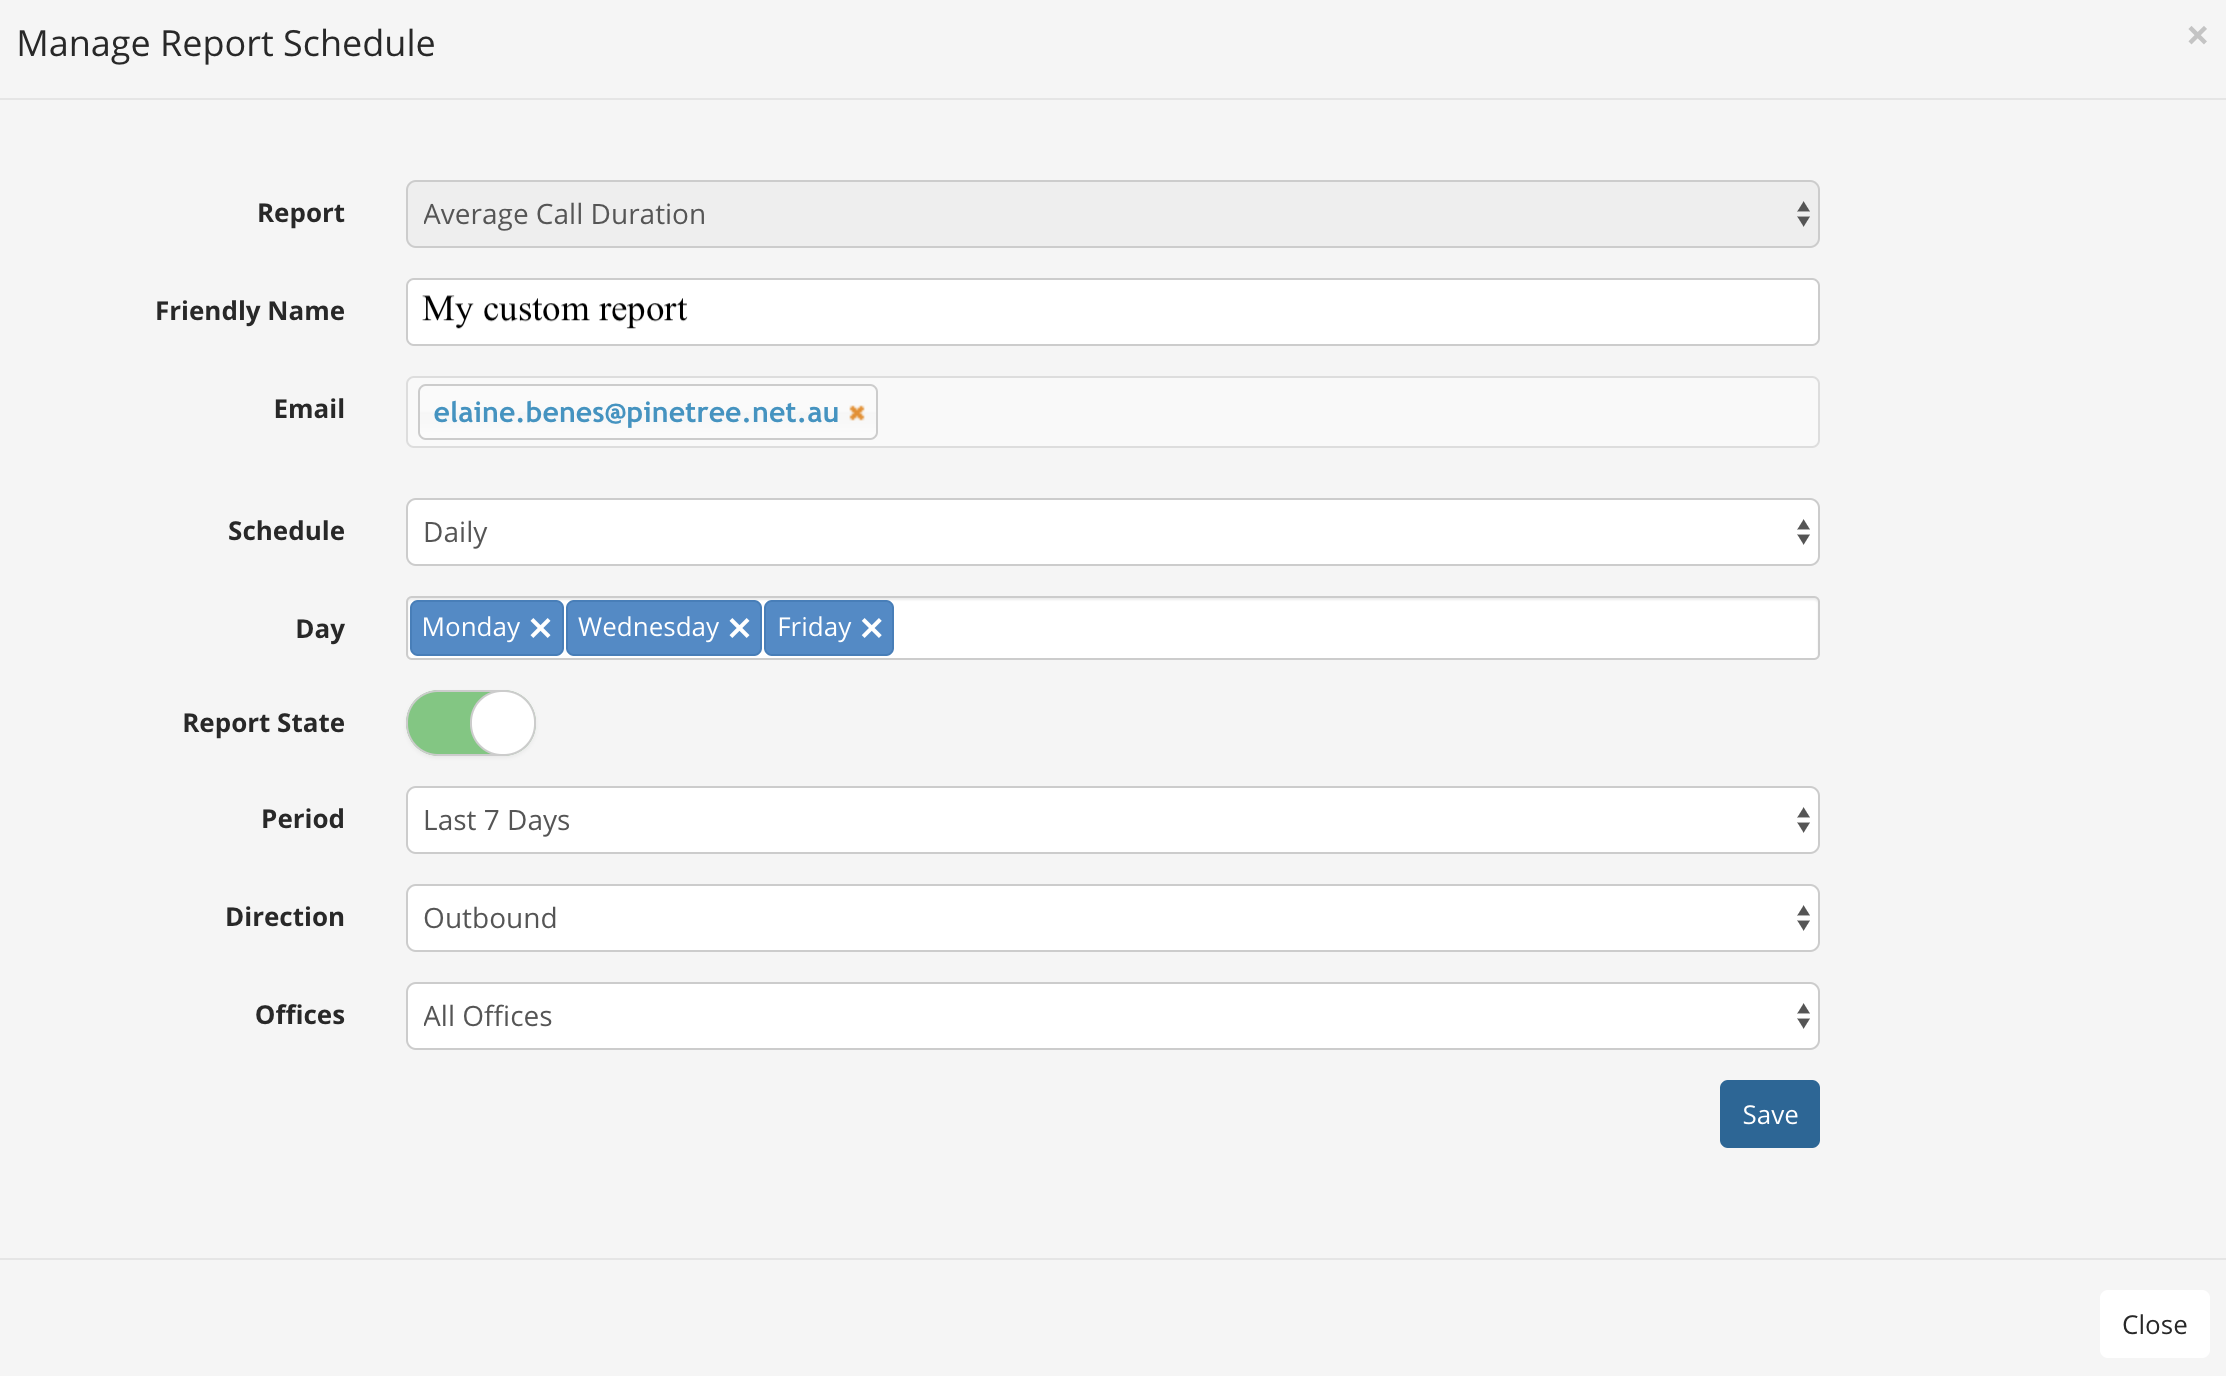
Report: This is the report type.
Friendly Name: This is your name for the report.
Email: Add as many email recipients as required.
Schedule: Choose from Daily, Weekly, or Monthly.
- Daily: Select the days you wish to receive the report.
- Weekly: Choose the day of the week you wish to receive the report.
- Monthly: Choose the day of the month you wish to receive the report.
Report State: Use the toggle switch to choose from ON or OFF.
Period: Choose from the last 7 days, 14 days, or the last month.
Direction: Choose from Inbound, Outbound, Internal, or All Calls.
Offices: Choose from a specific office, or all offices.
When you are finished, click the  button.
# View / Modify Existing Reports
Click Scheduled Reports from the left hand menu.
Here you can see the reports scheduled for the PBX including the report type, schedule, operating status, and the date last run.
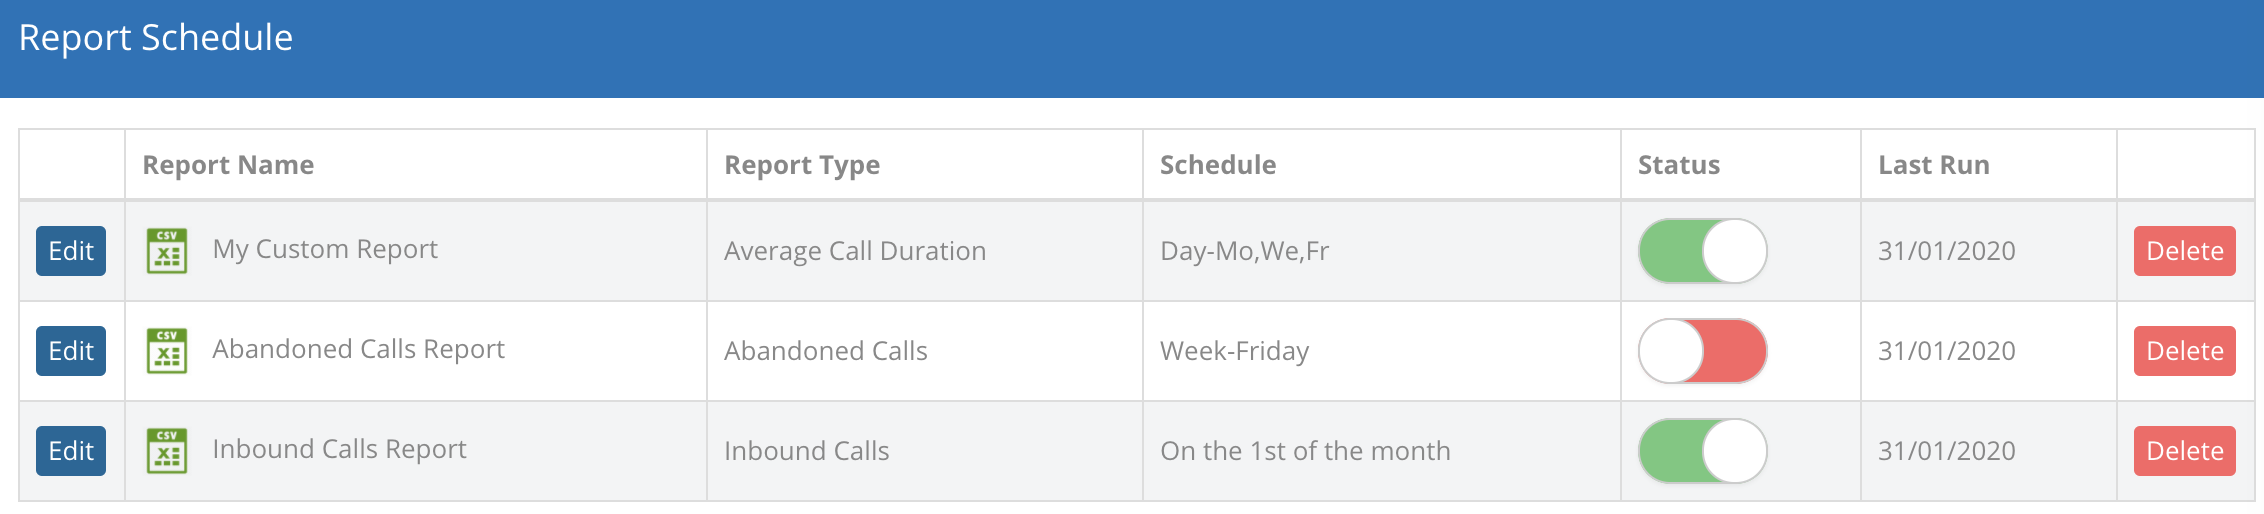
- To edit a report, click
 .
. - Use the toggle switches to enable or disable a report.
- To delete a report, click
 .
.
# Virtual Fax Archive
The 'Virtual Fax Archive' allows you to download your inbound Fax.
Click the 'Download' button to download a copy of the PDF.

NOTE: Fax are stored for 90 days only