# Directories
# Yealink
In order to make use of the directory feature, you will first have to know the IP of the handset.
Go to the web portal of the handset via the IP address and log in.
- Username: admin
- Password: ‘admin’ or ‘your extension password within ‘MyCloudPBX’
# Local Directory
Go to Directory - On the older portals it will be a tab along the top and on the newer portals it will be an option on the left-hand side.
Go to Local Directory - This will be an option on the left-hand side.
The easiest way if you have a lot of contacts is to export a .CSV file, fill it out and import it. However, you can fill it out via the portal if you like.
# Export the .csv file
Older Portal - Under Import Local Directory File section click the Export CSV button.
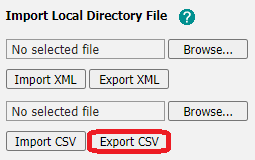
Newer Portal - Dropdown from Export and click the option for CSV.

# Edit the .CSV file
For the columns in the .CSV file, see below for the most important fields:
display_name : Name of contact
office_number : Office number for contact
mobile_number : Mobile number for contact
other_number: Another number for contact if required
When entering numbers please do not include spaces.
Also, note you do not have to fill all fields.
# Import the .csv file
Older Portal - Under Import Local Directory File section click Browse.
Select the .CSV file you would like to import, then click the Import CSV button.
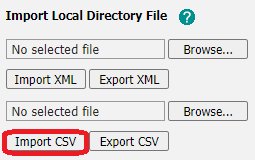
Newer Portal - Select the Import button.

Select the .CSV file you would like to import, then click the Import button.
# Create directory entry via handset portal
When entering numbers please do not include spaces.
Also, note you do not have to fill all fields.
Older Portal - Under Directory section fill out the fields required then click on the "Add" button.
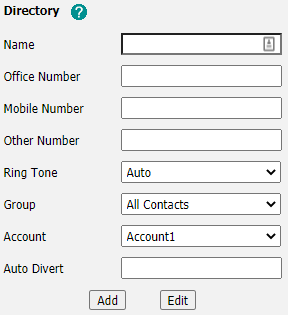
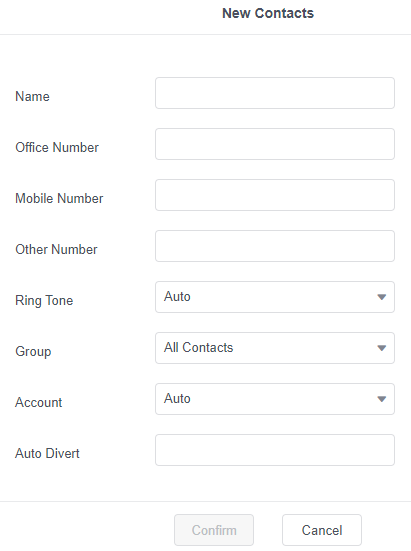
Newer Portal - Select the New Contacts button.

Fill out the required fields then click on the "Confirm" button.
# Hosted Directory
This is the best option if you would like to be able to have a central place to update your directories.
Go to Directory - On the older portals it will be a tab along the top and on the newer portals it will be an option on the left-hand side.
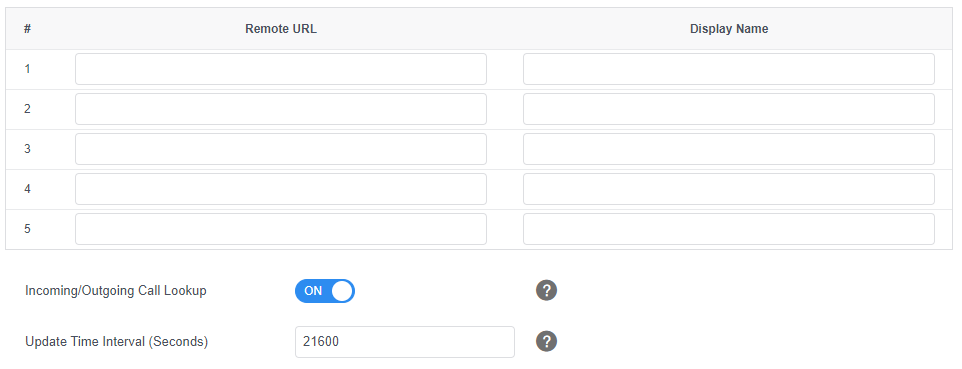
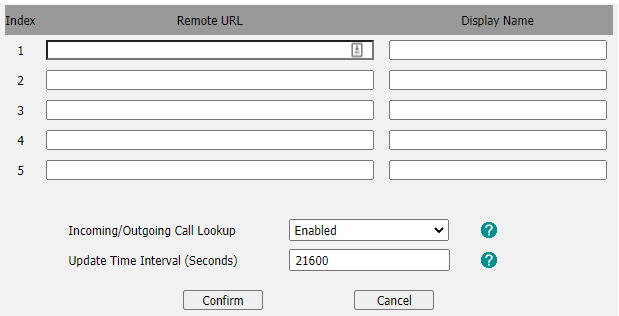
Go to Remote Directory - This will be an option on the left-hand side.
Enter the Remote URL of where your .XML/.CSV is hosted.
For the Remote URL you will need your IT team to hosted the .XML or CSV Directory, on a local file server, within the network.
To get a template of the .XML/.CSV file to host, use the steps from Export the .csv file and Edit the .CSV file above.
Enter a Display Name of your choice.
Enable Incoming/Outgoing Call Lookup.
Older Portal
Newer Portal